


- Web templates
- E-commerce Templates
- CMS & Blog Templates
- Facebook Templates
- Website Builders
FAQs
General Tutorials
Featured templates
og体育首页ONE Subscrioption


The following instructions will show you how to access HTML/CSS files in Shopify based templates.
Log into Shopify backend and tap Online Store under the Sales Channels;

Under the Online Store option select ‘themes’. On the right click on a (...) link and choose Edit HTML/CSS;

Select the file you would like to edit on the left, apply modifications to the file using the Shopify inbuilt editor and click Save in top right corner;
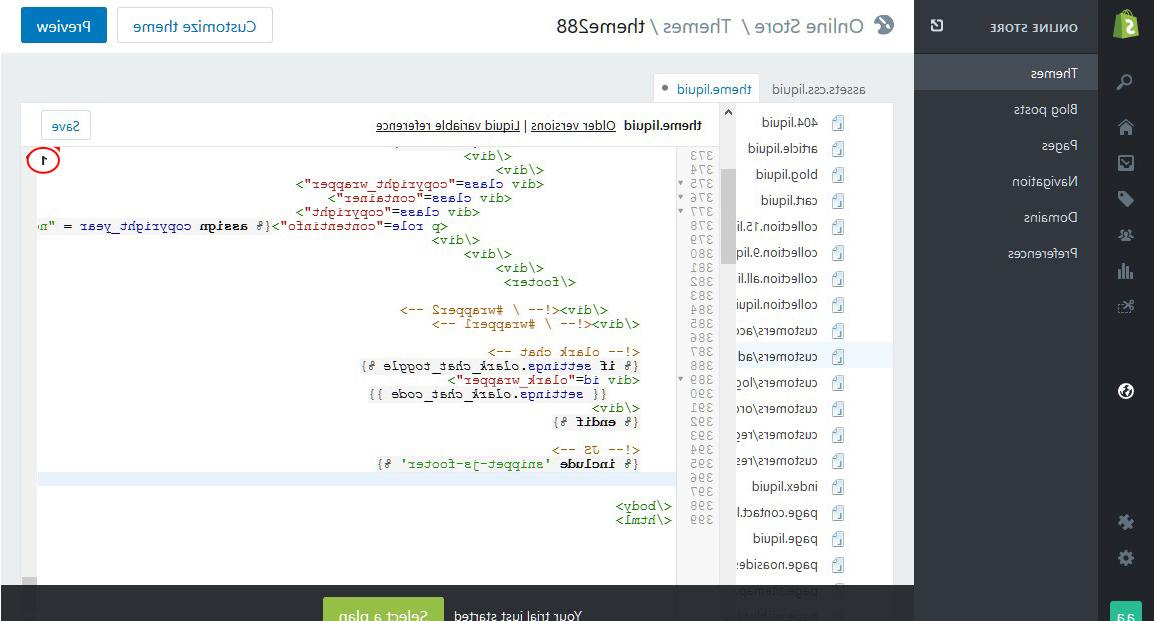
You will see the template file structure under the Edit HTML/CSS menu;
Template Layout directory; the layout directory is rendered as the Layouts folder in the Admin. It contains theme layout templates which by default is the theme.liquid file. All Liquid templates inside the templates folder are rendered inside the theme.liquid file;
Templates directory is rendered as the Templates folder in the Admin. It contains template pages (categories, cart, etc.);
Snippets directory is rendered as the Snippets folder in the Admin. It contains all the theme's Liquid snippet files which are bits of code that can be referenced in other templates of a theme. Use the include tag to load a snippet into your theme;
Assets directory is rendered as the Assets folder in the Admin. It contains all the assets used in the theme, including images, stylesheets, and javascript files. Use the asset_url filter to reference a theme asset in your templates.;
configs directory is rendered as the Configs folder in the Admin. It includes a settings_schema.json file and a settings_data.json file. The settings_schema.json file can be used to render Theme Settings form when changing the look and feel of a store. This directory also contains the settings_data.json file, which stores the merchant’s Theme Settings preferences;
Locales directory is rendered as the Locales folder in the Admin. It contains the theme locale files which are used to provide translated content for the theme;
To create a new instance of the asset file, for example, tap Add new asset link;

Shopify provides both upload file function and create a blank file function in the admin area;
Select, for example, create a blank file, give your file a name and select extension.

Feel free to check the detailed video tutorial below:
Shopify. How to edit html/css files